测试
1
windows 使用docker desktop部署dify
https://docs.dify.ai/getting-started/install-self-hosted/docker-compose
按照以下命令,可顺利部署成功
系统要求
CPU: 至少2核
内存: 至少4 GB
Docker Desktop已安装并启用WSL 2后端
安装步骤
克隆Dify源代码
创建dify文件夹,在文件夹中打开PowerShell或命令提示符,运行:
1git clone https://github.com/langgenius/dify.git
进入Docker目录
1cd dify/docker
复制环境配置文件
1copy .env.example .env
启动Docker容器
根据Docker Compose版本选择相应的命令:
Docker Compose V2:
1docker compose up -d
Docker Compose V1:
1docker-compose up -d
检查容器运行状态
1docker compose ps
访问Dify初始化页面
打开浏览器,访问:
1http://localhost/i ...
使用 deepl api 进行翻译替换
目标:读取剪切板内容,翻译并替换原文。(中文翻译为英文,英文以及其他语言翻译成中文)1、先安装用于发送HTTP请求的Python库requests,以及pyperclip
12pip install requests pip install pyperclip
2、python代码:(修改其中deepl-api-key)
12345678910111213141516171819202122232425262728293031323334353637383940import requestsimport pyperclipdef translate_text(text, api_key): # 向 DeepL API 发起请求以自动检测语言并翻译 url = "https://api-free.deepl.com/v2/translate" params = { 'auth_key': api_key, 'text': text, 'target ...
watchtower自动更新docker容器
48小时更新一次指定容器,并且清理旧镜像【注意做好更新的容器的数据持久化】:12345docker run -d \ --name watchtower \ --restart=always \ -v /var/run/docker.sock:/var/run/docker.sock \ containrrr/watchtower 容器名称 --cleanup --interval 172800
docker run -d: 以后台守护进程方式运行容器。
--name watchtower: 为这个容器命名为 watchtower。
--restart=always: 在容器停止时自动重启。
-v /var/run/docker.sock:/var/run/docker.sock: 挂载 Docker 套接字,使 Watchtower 能够与 Docker 守护进程通信。
containrrr/watchtower: 使用 Watchtower 镜像。
容器名称: 只检查和更新指定的容器(用实际容器名称替换)。
--cleanup: 删除旧的未使用镜像。
--interva ...
hexo-butterfly使用hexo-tag-aplayer 实现全局音乐播放
1、hexo目录下安装npm install –save hexo-tag-aplayer
2、修改hexo目录下Hexo配置文件_config.yml
1234#全局音乐 需要将asset_inject设置成falseaplayer: enable: true asset_inject: false
3、修改hexo目录下主题配置文件_config.butterfly.yml找到: aplayerInject
1234# Inject the css and script (aplayer/meting)aplayerInject: enable: true # 开启音乐播放器 per_page: true #每个页面都有Aplayer
找到:pjax
1234#实现不会因跳转其他页面而重新播放音乐#类似异步请求的ajaxpjax: enable: true
找到:inject 在bottom里添加
1234567# Inject# Insert the code to head (before '</head>' tag) and t ...
图床图片加载速度测试
新建文本文档,填入以下python代码(gpt4.0写的)重命名:图片加载测试.py双击运行,或者cmd输入:python 图片加载测试.py
12345678910111213141516171819202122232425262728293031323334353637383940import requestsimport timedef test_image_loading_speed(image_urls): for url in image_urls: try: # 记录开始时间 start_time = time.time() # 发起GET请求,stream=True 允许我们逐步下载文件 with requests.get(url, stream=True) as response: response.raise_for_status() # 确保请求成功 # 定义每次读取的字节数 ...
腾讯CDN内容分发网络 使用api进行url刷新
简版步骤
1,安装腾讯云SDK
2、修改且运行脚本既可(填入你的密钥和要刷新的url)
【api账户开通 两个权限:QcloudCDNFullAccess QcloudCDNReadOnlyAccess】
1、安装腾讯云SDK1pip install tencentcloud-sdk-python
1.1、或者手动安装腾讯云SDK通过以下链接访问清华镜像源上的 tencentcloud-sdk-python 页面并下载最新版本的tar.gz文件:
https://pypi.tuna.tsinghua.edu.cn/simple/tencentcloud-sdk-python/
选择最新版本的 tencentcloud-sdk-python-*.tar.gz 文件进行下载。
解压下载的tar.gz文件:
假设你已经解压了文件,并且解压后的文件夹在你的当前目录下,比如D:\hexo\tencentcloud-sdk-python-X.X.X。
导航到解压后的文件夹:
打开命令行窗口,导航到解压后的文件夹。例如:
1cd D:\hexo\tencentcloud-sdk-py ...
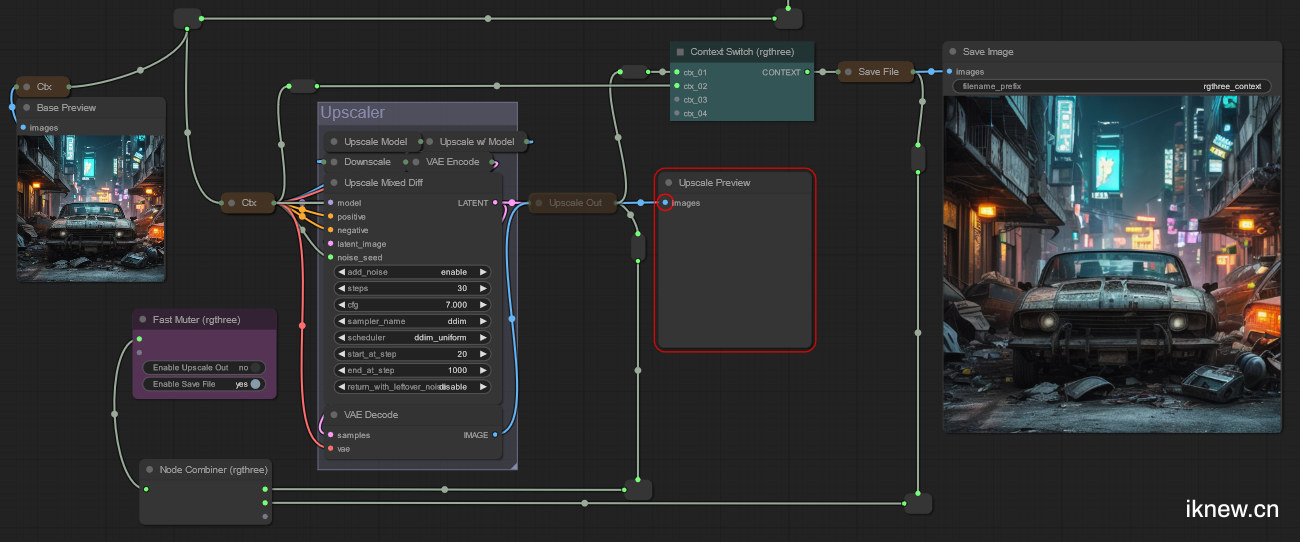
【comfyui】 rgthree 节点注释
github:https://github.com/rgthree/rgthree-comfy
节点切换和节点开关很实用,顺便把其他节点注释一下
Fast Actions Button: 提供一键执行与其连接的节点的操作,如静音、绕过或启用特定动作。
Fast Groups Muter: 快速静音一组节点,方便管理多个节点。
Node Collector: 节点收集器,用于整理并简化节点之间的连接。
【”Node Collector”节点就像是一个工作流中的有序集线器。】【像电线的集线器】
Mute / Bypass Relay: 静音/绕过中继节点,用于在节点间传递静音或绕过信号。
Mute / Bypass Repeater: 重复器节点,可以将其静音/绕过的状态传递给所有连接的节点。
Random Unmuter: 随机取消静音节点,为工作流添加随机性。
Reroute: 重新路由节点,帮助用户清理和组织工作流的布局。
【Reroute就像一个中继节点,整理数据线的那个卡扣】
Fast Groups Bypasser: 快速绕过一 ...
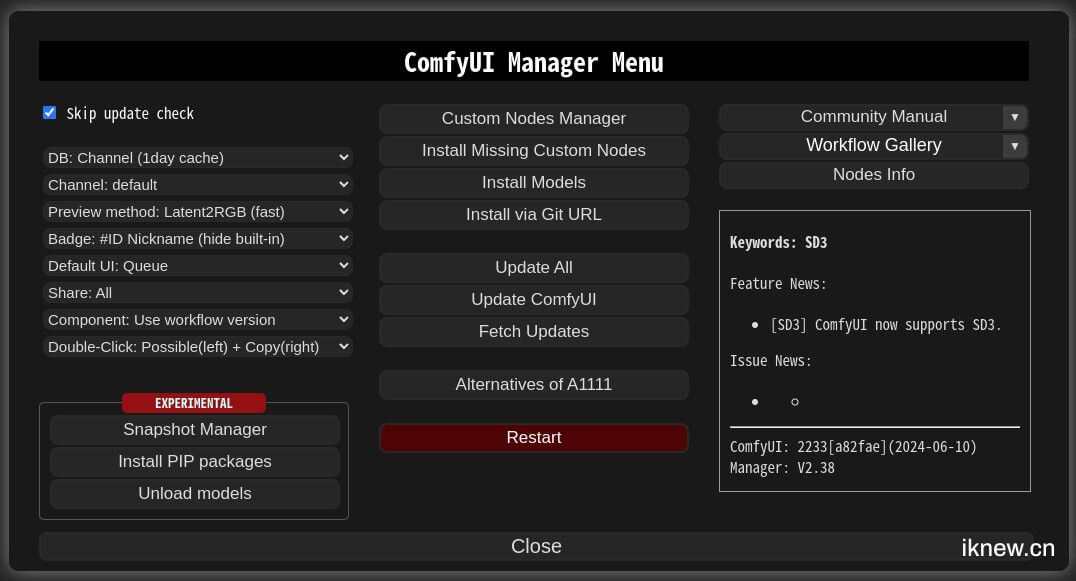
【comfyui】安装插件管理器 ComfyUI Manager
github地址:https://github.com/ltdrdata/ComfyUI-Manager
下载后,解压到ComfyUI/custom_nodes目录下或者在ComfyUI/custom_nodes目录下,进入终端(地址栏输入cmd),然后输入:
git clone https://github.com/ltdrdata/ComfyUI-Manager.git
重启comfyui,即可
若是install custom nodes 打不开,可以勾选use local BD
over


